|
Add Default Object |
 Where to find it:
 Main Window / Objects
Main Window / Extension Pack / Objects
Object Palette / Right Click
Shortcut: (unassigned, use "Edit / Shortcuts" to assign)
The Add Default Object shelf allows you to choose from several default objects to add to your Mari Project. You can also define your own objects to import.
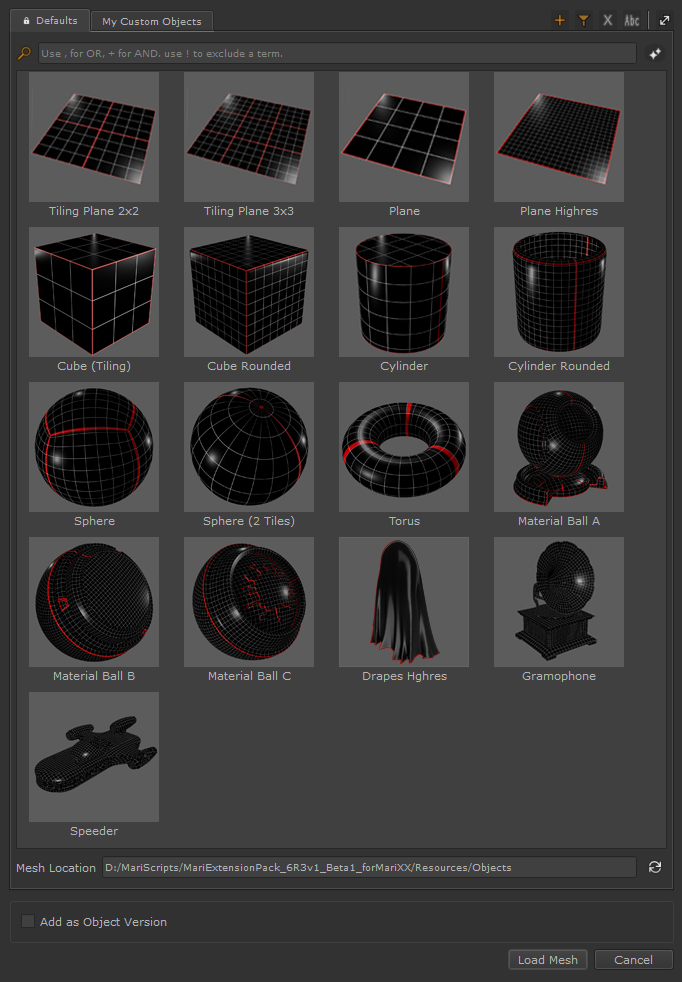
By default the Object will be added as an Object Version to the currently active Object.
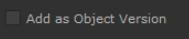
When Add as Object Version is unchecked, the Object will be added to your Project as a new Object
The Add as Object Version Checkbox is automatically checked if the dialog was launched via Right Mouse Click, with an Object selected.
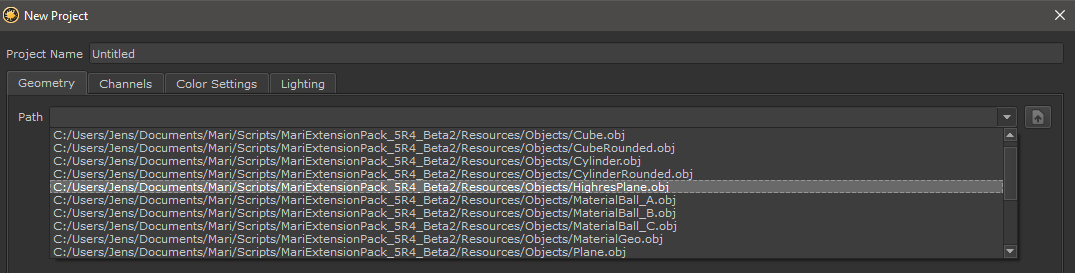
Default Objects are also available in the Recent File List of the 'New Project' Dialog
|
Adding custom Geometry Shelves |
To create your own custom shelf with your own geometry, click the "+" button in the top right corner of the dialog
Specify a unique shelf name in the dialog and point the location to a path containing your geometry files.
Currently supported file formats are
•.OBJ
•.ABC
•.USD
•.USDA
Apart from manually adding Shelves, you can also add them via an Environment Variable -- this way you can make default Objects easily available for an entire team of artists.
To add Shelves via an environment variable set
•MARI_EP_CUSTOM_DEFAULT_OBJECTS_FOLDER
.. to one or multiple folders containing your geometry. Each folder will result in a shelf to be created.
By default only a placeholder thumbnail will be shown for your geometry
To define a custom thumbnail either
•place a image file in the same folder as your geometry, with the same file name. For example if your Geometry file is called "Head.obj", place a file called "Head.jpg" next to it.
Supported image formats are JPG, PNG, BMP and SVG
•Alternatively you can define a custom thumbnail path via a json file. See the next section on Item customizations for more information
Geometry Items in the Shelf can be fully customized via a so called JSON File. You can define
•custom UI naming
•custom tooltip
•custom thumbnail path
•Python Callbacks (e.g. to import nodegraphs after adding the object)
•custom geometry load options (Selection Groups etc.)
To define a JSON file, place the file next to your geometry file with the same name. For example if your Geometry file is called "Head.obj", place a file called "Head.json" next to it.
JSON Files are python readable dictionary files. You can edit them with a regular text editor. Below is an example
{
"Thumbnail Path": "c:/myPath/file.png",
"Tooltip": "A plane allowing you to create tileable textures.<br><br>The result will tile 2x<br><br><b>UDIMS:</b> 1 (overlapping)",
"UI Name": "Tiling Plane 2x2",
"Mari Geo Name": "Default Object: Tiling Plane 2x2",
"Python Callback File": "c:/myPath/file.py",
"Load Options": {
"CreateSelectionSets": 0,
"MergeSelectionGroupWithSameNameType": 0
}
}
•Thumbnail Path
Allows you to define the path to a custom thumbnail file for the item. Supported image formats are JPG, PNG, BMP and SVG. Use "" to leave it empty.
|
|
The path always needs to consist of forward slashes (/). Backward slashes (\) are not allowed |
•Tooltip
Defines the Tooltip that should be displayed on the item inside the Shelf. Tooltips support HTML formatting. Use "" to leave it empty.
•UI Name
The Label displayed in the Shelf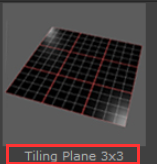
•Mari Geo Name
The Name of the Geometry as it should appear in the Object Palette after import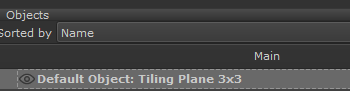
•Python Callback File
Python callback files allow you to specify python scripts that will get evaluated after the import is complete.
This can be used to for example subdivide the mesh after import, import a nodegraph onto it etc.
|
|
The path always needs to consist of forward slashes (/). Backward slashes (\) are not allowed |
You can define a working python script here or simply place a python file with same name next to the geometry file. For example if your Geometry file is called "Head.obj", place a file called "Head.py" next to it.
Below is a working example that is in use on Extension Pack's Speeder Default Object. You can find the original file under /Extension Pack/Resources/Objects
"""
If a function called main() exists, this will be the primary function called after the import completed.
============ AUTOMATIC GLOBAL VARIABLES ============================
The Default Object loader auto-defines two Global Variables
MARI_GEO: mari.GeoEntity, the object result of the import.
MARI_GEO_VERSION: mari.GeoEntityVersion, the geo version result of the import. This will be None,
if the Default Object was imported as a new Object instead of an object version -
which is how you know what Action the user chose ("Add as Object Version" yes/no)
"""
import mari
def subdivide_geo(geo, geo_version):
# we only subdivide if the model was imported as a new object, in which case "geo_version" will be None
if not geo_version:
optionsDictSpeeder = {
"Level" : 1,
"Force" : True,
"LimitEnabled": False,
"Scheme" : mari.geo.SCHEME_CATMARK,
"Boundary Interpolation" : mari.geo.VTX_BOUNDARY_EDGE_AND_CORNER,
"Face Varying Interpolation" : mari.geo.FVAR_LINEAR_CORNERS_ONLY,
"Creasing": mari.geo.CREASE_UNIFORM,
"Triangle Subdivision": mari.geo.TRI_SUB_CATMARK
}
geo[0].generateSubdivision(optionsDictSpeeder)
geo[0].setSubdivisionLevel(1)
subdivide_geo(MARI_GEO, MARI_GEO_VERSION)
•Load Options
The Load Options allow you to pass standard Mari python arguments to the Geometry Loading Process. The full list of load options is available in Mari's Python API Help. Below is a list of options supported by Mari 7.1. Other versions might support more or less options
"MappingScheme" - geometry mapping scheme (type MeshOptions).
"MultipleGeometries" - how to handle multiple geometries in a single object (type MultipleGeometryOptions).
"PtexFaceSizeScheme" - Ptex specific: scheme to use for face texture size calculations (type PtexFaceSizeScheme).
"PtexFaceSize" - Ptex specific: size to use with the scheme above (type int).
"PtexImageFormat" - Ptex specific: image data format (type PtexFormat).
"PtexFaceColor" - Ptex specific: color to clear faces to (type Color).
"PtexImportFilename" - Ptex specific: import an existing Ptex file onto the .obj geometry (type string).
"PtexShowCreationDialog" - Ptex specific: show the Ptex creation dialog after mesh loading (type Bool; default is False from Python).
"EachMeshCreatesObject" - each mesh can either create an Object or each be a geometry within a single Object. This is currently Ptex specific. (type Bool; default is True).
"MergeType" - merging of geometries can be either single-mesh or just-merge-nodes (type mari.GeoManager.MergeType).
"MergeSelectionGroupWithSameNameType" - merging of face selection groups that have the same name (type mari.GeoManager.MergeSelectionGroupWithSameNameType) - default is mari.GeoManager.MERGESELECTIONGROUP_MERGE_SELECTIONGROUP_HAVING_SAME_NAME
"CreateSelectionSets" - specify whether to create selection sets from face groups (type CreateSelectionSetOptions) - default value is mari.GeoManager.CREATE_FROM_FACE_GROUPS
"FrameOffset" - specify the start frame in Mari’s timeline to import the geometry (default value is zero).
"GeoChannels" - specify whether to create Geo-Channel(s) on a single GeoEntity added as part of the load() function. This is a dictionary of {key = names of geo-channels to create, value = image path template to import a sequence of images onto the geo-channel}. Note that the geo-channels will only be added if there is a single GeoEntity created, either through all the geo meshes merged together or a single geo mesh being specified. In the case of multiple GeoEntities, please use the GeoEntity::createGeoChannel API once the objects have been added.
|
Shelf Controls |
The Buttons in the upper right corner of the Window allow you to add custom shelf tabs, rename and remove them as well as control the thumbnail sizes
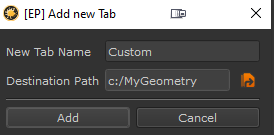
•Create a new Tab

Allows you to add a new Tab to the Object Browser
A dialog will appear asking you to specify a Tab Name and a Location on Disc where your Geometry is stored.
Geometry files within the location will be displayed in the shelf tab

oTab Names need to be unique
oThe Destination Path can be a path from an existing tab in which case you get a duplicate
oThe Destination Path can be shared by multiple people, allowing you to have a shared folder where added content updates for all team members
|
|
Tabs can be added for all members of team globally using an Environment Variable |
•Create new Tab from Filter

Allows you to add a new Tab from the currently active Tab Filter.
A new dialog will appear asking to specify a Tab Name.

oTab Names need to be unique
•Delete current Tab

Removes the current Tab. Only the Tab is removed, not the geometry files ondisc.
•Rename current Tab

Renames the current Tab
•Icon Size

Determines the Icon Size of Presets
|
Tiny: |
35x35 px |
|
Small: |
58x58 px |
|
Medium: |
90x90 px |
|
Big: |
125x125 px |
|
Large: |
200x200 px |
|
Huge: |
400x400 px |
The Filter Bar allows to filter the current preset tab.
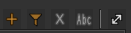
•Clear Filter
![]()
Removes the Filtering from the Filtering Field
•Filter Field
Filter the current Tab. Filtering is done by:
oPreset Name
oPreset Tags
Filtering Operators are
▪Comma (,)____________
Separate multiple search terms or search term operators via a comma. If any of the terms in found the preset is displayed
e.g.: Cube,Sphere will display any geometry that has 'cube' or 'sphere in its name or tags
🞙Plus (+)_____________
The Plus (+) operator stipulates a combination of terms that are required to be a filter match
e.g.: Cube+Spherewill display any geometry that has both 'Cube' and 'Sphere' in its name or tags
🞙Exclamation Mark (!)_____________
The Exclamation Mark (!) operator excludes a search term
e.g.: 'Cube+!Sphere' will give you only items that have 'Cube' in its name or tags but the items are not allowed to have 'Sphere" in name/tags
|
|
You can easily create a new tab from the result of the filtering using the |

The Mesh Location displays
othe current Tab's Source Location on Disc
oallows the reloading of the current Shelf 