|
Height Blend |
 Where to find it: (This Node is available in the Nodegraph only)

![]() NodeGraph / Right Mouse Click / Add Nodes / Layer / Extension Pack /
NodeGraph / Right Mouse Click / Add Nodes / Layer / Extension Pack /
Shortcut (Nodegraph Only): CTRL+ALT+H


The Height Blend Node allows you to blend together two Height/Displacement or Bump maps. It is capable of outputting either
the combined new Height or a Mix Mask that you can use to blend entire materials.
|
|
|
To Materials blended together using a Height Blend Node's Mask Output

|
Quick Setup |
 You can create the setup with two (material or regular) nodes selected and by pressing CTRL+ALT+H
Alternatively you can select two (material or regular) nodes and choose the "Height Blend" Option from the Node Creation Hotbox (Hotkey C)
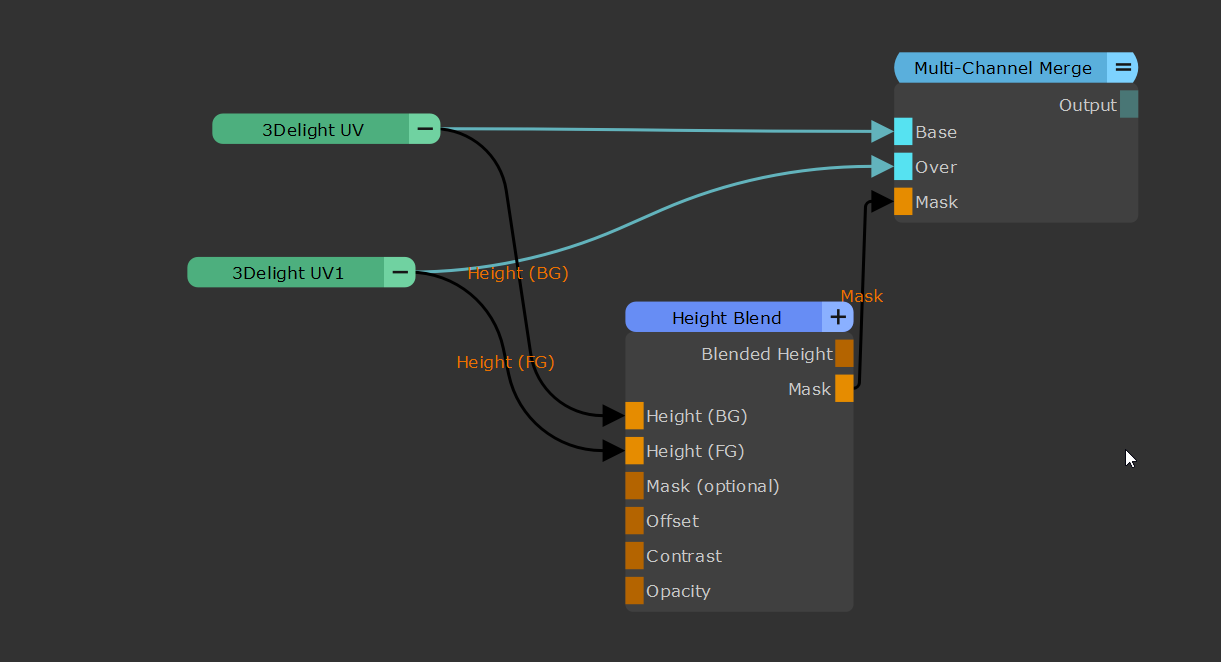
Finally you can also access it via new Node Context Menus, by selecting a Multi Channel Merge Node and pressing CTRL+SPACE
Example of an automatically created Height Blend Setup where the displacement of the materials is fed into the BG and FG ports of the Height Blend Node
|
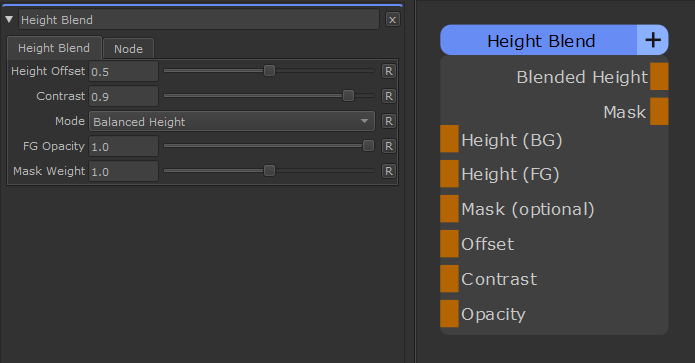
Node Overview |
|
Node Ports |
