|
Sticker Designer |
 Where to find it:

![]() NodeGraph / Right Mouse Click / Annotations /
NodeGraph / Right Mouse Click / Annotations /
Main Window / Extension Pack / Nodegraph / Annotations /
Shortcuts (Nodegraph Only): ALT + CTRL + Scrolllock

The Nodegraph Sticker Designer allows you to create completely custom Image Annotations using a full set of painting and vector tools.
In addition it supports editing of existing annotations and pasting reference images from the clipboard

Once closed, your images authored in the Sticker Designer will become normal "Image Annotation" Nodes you can move and transform in Mari's Nodegraph
|
Introduction |
Launch the Sticker Designer from the Nodegraph Right Mouse Click Menu or via the Hotkey ALT+CTRL+Scrolllock
A new Menu will overlay the Nodegraph and the Nodegraph itself will be turned into a paint canvas
|
|
You can still pan around in the Nodegraph by pressing and holding the ALT Hotkey and dragging your mouse in the Nodegraph |

You can either start with a blank canvas or edit existing Image Annotations.
To edit existing Annotations, select one or multiple Stickers in the Nodegraph before launching the Sticker Designer. You will be prompted if you want to lift the Stickers into the Designer.
Each selected Sticker will be lifted as a separate item into the sticker designer and can be edited individually

You can directly paste image data from your clipboard using the CTRL+V Hotkey, once the tool is open - for example to embed reference into a Sticker
•The Menu Widget can be freely moved within the Nodegraph
•The individual menu groups can be exapnded and collapsed

•All UI elements have tooltips explaining basic functionality and listing shortcuts

•Sliders can be adjusted in multiple ways, apart from directly modifying it
oDrag the icon next to a slider. Hold the ALT Hotkey to slow down the adjustment speed
oRight mouse click on a slider and drag an increment button for slower or faster adjustments
oPlace your cursor into the Text field and use Arrow Up / Down to modify the value
oIf you enter a value into the Input field that is outside the slider range, the slider will automatically re-range itself to account for the new value
•Color fields can be modified in multiple ways:
oclicking on a color field will open a color picker
odrag and drop a color swatch onto it
oa singe click on a colorswatch will change the Foreground Color
oALT clicking on a colorswatch will change the Background Color
|
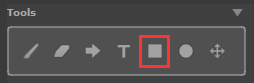
Tools |
Use the Tools Group to modify the active Tool and adjust its properies via the Tool Properties

Tools come in two categories - Vector Shapes & Paint Tools.
Vector Shapes
Vector Shapes can be edited after creation and their settings be changed and updated at any time in the process of creating a Sticker
The three Vector based tools
|
Text Tool |
A regular Text Tool creating Text Elements |
|
Polygon Tool |
Create polygonal shapes such as triangles, squares/rectangles etc. |
|
Ellipse Tool |
Create Circles and Ellipses |
Example of creating and editing a polygon shape
Paint Tools
Paint Tools create rasterized pixels on the canvas
|
Paint Brush |
A freehand paint brush |
|
Eraser |
Erase paint created by the Paint Brush, Arrow tool or other rasterized pixel data (e.g. pasted reference) |
|
Arrow Tool |
Convenience Option to create Arrows |
Paint Buffer
While Vector Tools directly create their shapes on the active Layer, Paint Tools first draw on an invisible plane hovering over the canvas - called the "Paint Buffer".
This system mimics Mari's Paint Buffer system with similar Hotkeys.
Paint in the Paint Buffer must be commited to a layer after it is applied. Paint can be commited in multiple ways
•Selecting a Vector Tool instead will auto commit the active paint
•Switching Layers or Image Notes will commit the active paint buffer to the selected layer before the switch is performed
•To manually commit paint you can press the Hotkey B
•To clear the contents of the Paint Buffer without commiting it you can press Hotkey CTRL+ALT+C
If there's paint in the paint buffer or not, can be seen by the "brush" icon in the lower right corner of the layerstack. Pressing the icon will also commit the paint
No Paint in Buffer vs Paint In Buffer


Tool Hotkey: P
The Paint Brush Tool allows freehand painting on any Paint Layer.

|
Paint Brush Tool Properties |

•Bush Size
Use the Brush Size Slider to increase or decrease the Brush size. The Brush Size is measured in Pixels.
To change the Brush size via Hotkeys use
oKeys [ and ] to decrease or increase the Size in increments of 3
oKeys ALT + [ or ] to decrease or increase the Size in increments of 1
Example of different Brush sizes

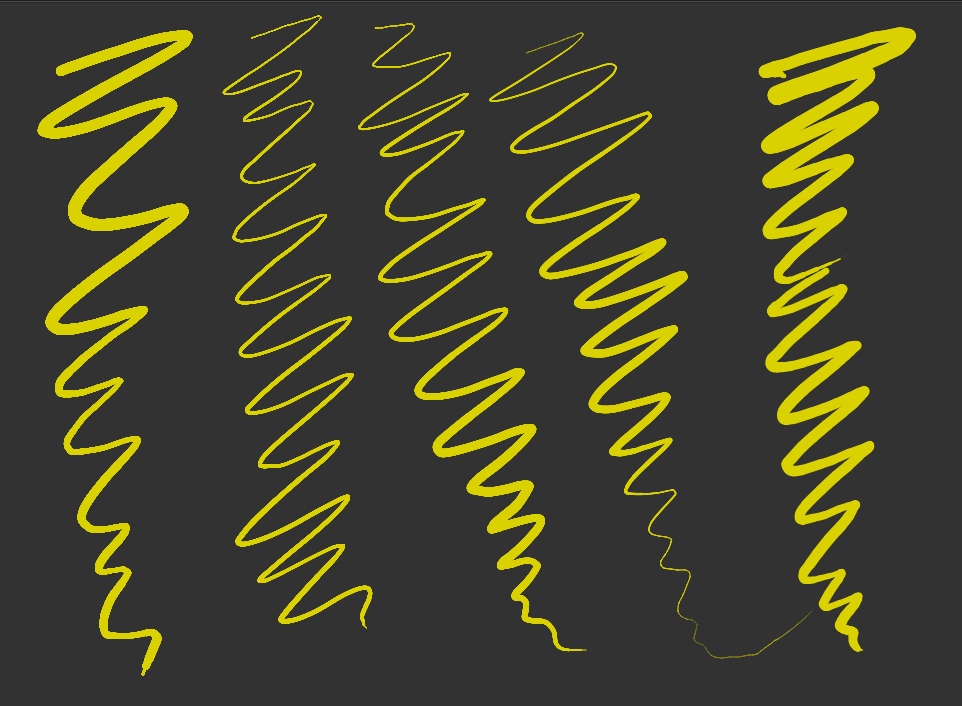
•Stroke Smoothing / Steady Stroke
Sets the amount of interpolation that is applied to the painted stroke. Higher values average the points of your paint stroke for a smoother more 'elastic' feeling.
|
|
Use very low Stroke Smoothig Values to maintain the general look of your stroke while filtering out small hand movements |
To change the Stroke Smoothing via Hotkeys use
oKeys "+" and "-" to decrease or increase the Stroke Smoothing in increments of 5
oKeys ALT + "+" or "-" to decrease or increase the Stroke Smoothing in increments of 1
Use Stroke Smoothing for less jittery Stroke Appearances
•Pen Pressure Curves
Allows you to choose a mapping scheme for your pressure sensitivity. The curves will remap your pens pressure sensitivity to be weaker or stronger at either end of the amount of pressure you apply

Example of similar strokes with different Pen Pressure Curves

•Brush Type

The Brush type can be used to switch between a solid stroke and a "dashed" one.
|
|
The Brush Size affects the size of the gaps when in "dashed" mode |
A solid stroke (top) vs a dashed one (bottom)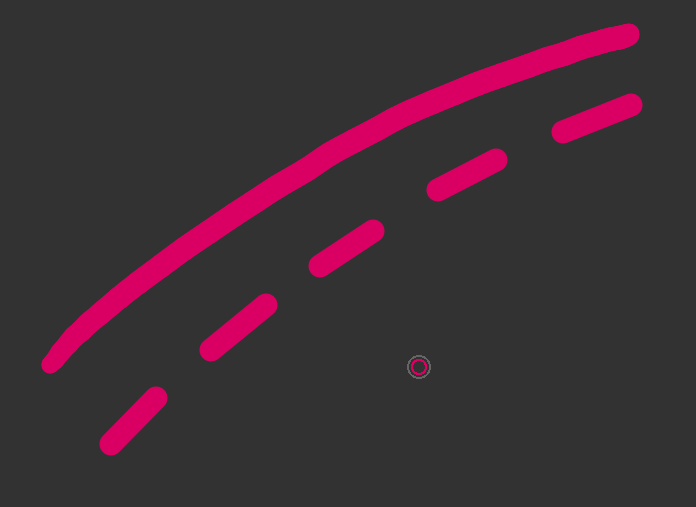
•Straight Line Mode
While drawing hold Hotkey Shift to draw straight lines. Hold Hotkeys CTRL + SHIFT to snap in 45 degree increments

Tool Hotkey: E
The Eraser Tool allows you to erase paint from Paint Layers. It's general functionality is identical to the Paint Brush Tool.
|
|
The Eraser can remove both paint that is still in the Paint Buffer and Paint that is commited to a Layer |

|
Eraser Tool Properties |
•Bush Size
Use the Brush Size Slider to increase or decrease the Eraser size. The Brush Size is measured in Pixels.
To change the Brush size via Hotkeys use
oKeys [ and ] to decrease or increase the Size in increments of 3
oKeys ALT + [ or ] to decrease or increase the Size in increments of 1
•Stroke Smoothing / Steady Stroke
Sets the amount of interpolation that is applied to the eraser stroke. Higher values average the points of your paint stroke for a smoother more 'elastic' feeling.
|
|
Use very low Stroke Smoothig Values to maintain the general look of your stroke while filtering out small hand movements |
To change the Stroke Smoothing via Hotkeys use
oKeys "+" and "-" to decrease or increase the Stroke Smoothing in increments of 5
oKeys ALT + "+" or "-" to decrease or increase the Stroke Smoothing in increments of 1
Use Stroke Smoothing for less jittery Stroke Appearances. Here we are looking at the effect of it on a regular paint brush instead of the eraser
•Pen Pressure Curves
Allows you to choose a mapping scheme for your pressure sensitivity. The curves will remap your pens pressure sensitivity to be weaker or stronger at either end of the amount of pressure you apply
Example of similar strokes with different Pen Pressure Curves, here we are looking at the effect of
different curves applied to a regular paint brush for better illustration
•Brush Type
The Brush type can be used to switch between a solid stroke and a "dashed" one.
|
|
The Brush Size affects the size of the gaps when in "dashed" mode |
A solid stroke (top) vs a dashed one (bottom). Here illustrated on a regular Paint Brush instead of the Eraser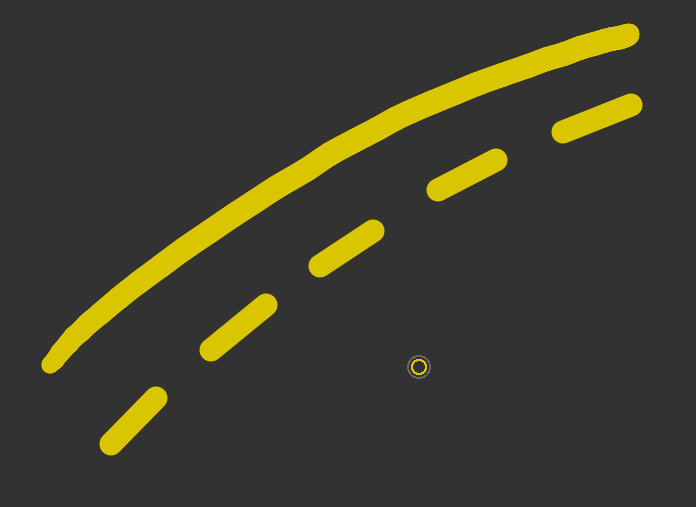
•Straight Line Mode
Same as for the Paint Brush, while drawing hold Hotkey Shift to draw straight lines. Hold Hotkeys CTRL + SHIFT to snap in 45 degree increments
Example of straight line mode here shown with the regular Paint Brush

Tool Hotkey: A
The Arrow Tool is a helpful annotation tool to quickly create arrows with one or two arrow tips

|
Arrow Tool Properties |

•Bush Size
Use the Brush Size Slider to increase or decrease the Brush size of the arrow. The Brush Size is measured in Pixels.
To change the Brush size via Hotkeys use
oKeys [ and ] to decrease or increase the Size in increments of 3
oKeys ALT + [ or ] to decrease or increase the Size in increments of 1
Example of different Brush sizes
•Stroke Smoothing / Steady Stroke
Sets the amount of interpolation that is applied to the arrow stroke. Higher values average the points of your paint stroke for a smoother more 'elastic' feeling.
|
|
Use very low Stroke Smoothig Values to maintain the general look of your stroke while filtering out small hand movements |
To change the Stroke Smoothing via Hotkeys use
oKeys "+" and "-" to decrease or increase the Stroke Smoothing in increments of 5
oKeys ALT + "+" or "-" to decrease or increase the Stroke Smoothing in increments of 1
Use Stroke Smoothing for less jittery Stroke Appearances

•Wing Tip Size
Modify the Wing Tip Size to change the length of the arrow lines
|
|
You can manually enter values larger than 100 in the value field to expand the default slider range |
To change the Wing tip size via Hotkeys use
oKeys "," (comma) and "." (dot) to decrease or increase the Wing Sizein increments of 5
oKeys ALT + "," (comma) or ALT + "." (dot) to decrease or increase the Wing Size in increments of 1
Different Wingtip sizes on arrows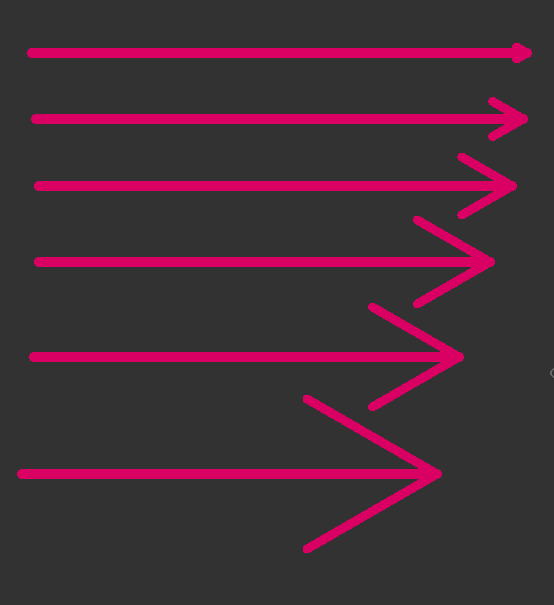
•Arrow Direction
Use the arrow direction toggles to have Arrow tips appear at the beginning of the stroke, the end of the stroke, or both ends.
To change the Arrow Direction via Hotkeys use the Keys
oArrow Left or Arrow Right
•Straight Line Mode
While drawing hold Hotkey Shift to draw straight lines. Hold Hotkeys CTRL + SHIFT to snap in 45 degree increments

Tool Hotkey: T
The Text Tool allows you to create editable Text elements. A Text Element gets created on a dedicated "Text Layer" Type. A Text Layer can hold one Text Element
|
Creating Text |
•Select the Text Tool (Hotkey T) and single click in the nodegraph to create a text element. A new Text Layer will be created
•If you are already on a Text Layer, double click in the nodegraph to create a second text element on a new Text Layer.
•You can press and hold CTRL to tansform the text with the Text Layer selected
|
Text Tool Properties |
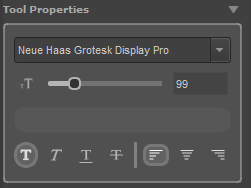
|
|
Text Property changes can apply either to selected characters or the entire text |
•Font
Let's you define the Font Family. You can type in the Dropdown Menu to easily choose a font you know the name of
•Font Size
Let's you define the point size of the Text.
•Font Style

Choose from different font styles
oBold - Hotkey CTRL+B
oItalic - Hotkey CTRL+I
oUnderlined - Hotkey CTRL+U
oStriked
•Alignment

Align text left, centered or right within the bounding box of the text. This will only have an effect if your text consists of multiple lines
|
Editing and Transforming Text |
•Editing previously created Text
Text Elements are tied to specific Layers marked with a "T". Selecting a Text Layer will auto select its contents and allow you to edit the text again.
Each Text Layer can hold only one Text Item.
Example of a Text Layer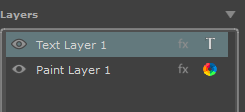
•Creating new text while on a text layer
Double click in empty space to create a new text layer if you are already on an existing text layer
•Transforming a Text Element
A Text Element can be scaled, rotated and moved in multiple ways:
Drag outside of the text element to move the text around
Press and hold CTRL to enter Transform Mode, allowing you to rotate, scale and move the item![]()
To rotate in 45 degree increments hold CTRL + SHIFT
If you prefer to use numerical inputs, choose the Transform Tool instead
Tool Hotkey: S
The Polygon Tool allows you to create editable polygonal elements such as Triangles, rectangles etc.. A Polygon shape gets created on a dedicated "Shape Layer" Type. A Shape Layer can hold one single Shape Element
|
Creating a Polygon |
•Select the Polygon Tool (Hotkey S) and drag out a polygon in the Nodegraph. Hold Shift to drag out a polygon where all 4 sides of the bounding box are equal. A new Shape Layer will be created for you
•To create a second polygon when already on a Shape Layer, double click in the nodegraph
•You can press and hold CTRL to tansform the polygon with the Shape Layer selected
•While a Polygon element is selected you can modify its properties at any time (color, sides etc.)
|
Polygon Tool Properties |

•Outline Width
Defines the width of the outline in pixels if Outline Mode is toggled on
•Fill / Outline

Toggle if you want to have a filled shape and/or one with an outline.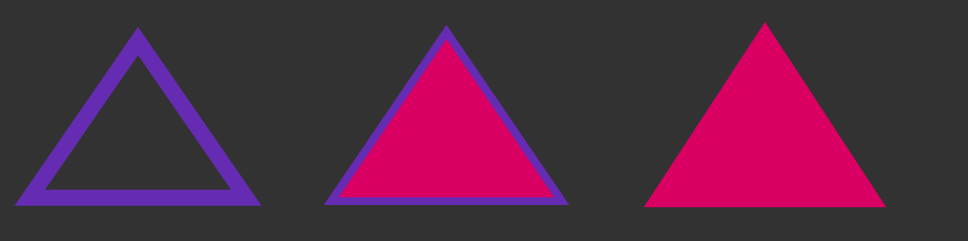
•Sides

Control the number of sides of the Polygon. Minimum is 3. To enter a value above 12 enter it manually into the text field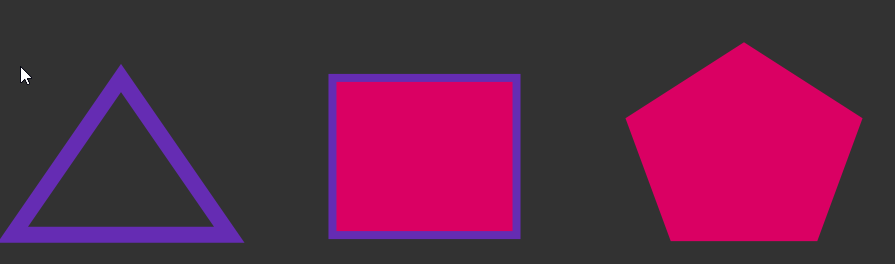
•Color
Fill and Outline color are controlled via the BG/FG Color swatches
To change a color ..
omanually edit them via the Color Selector Popup (click on color)
oDrag and drop a color swatch from the "Color Swatches" group onto the color field
oSingle click on a color swatch to assign the fill color
oAlt+Single click on a color swatch to assign the outline color
|
Editing and Transforming a Polygon |
•Editing previously created Polygons
Polygon Elements are tied to specific Layers marked with a "Square". Selecting a Shape Layer will auto select its contents and allow you to edit the item again.
Each Shape Layer can hold only one Shape Item (Polygon or ellispse
Example of a Shape Layer
•Creating new shapes while on a shape layer
When on a Paint or Text Layer, dragging out a Shape will auto create a new Shape Layer for you. If you are already on an active Shape Layer, dobule click in the Nodegraph to create a new Shape Layer
•Transforming a Shape Element
A Shape Element can be scaled, rotated and moved in multiple ways:
Select the active shape layer and drag outside the shape to move it around
Hold CTRL to enter transform mode
Hold CTRL+SHIFT while rotating to rotate in 45 degree increments
If you prefer to use numerical values, switch to the "Transform Tool", activate the Layer Transform Option and use the text fields to enter values

Tool Hotkey: C
The Ellipse Tool allows you to create editable circles and ellispes. A Ellispe shape gets created on a dedicated "Shape Layer" Type. A Shape Layer can hold one single Shape Element
|
Creating a Ellipse |
•Select the Ellipse Tool (Hotkey C) and drag out an ellipse in the Nodegraph. Hold Shift to drag out a circle. A new Shape Layer will be created for you
•To create a second ellipse when already on a Shape Layer, double click in the nodegraph
•You can press and hold CTRL to tansform the ellipse with the Shape Layer selected
•While a ellipse element is selected you can modify its properties at any time (color, sides etc.)
|
Ellipse Tool Properties |
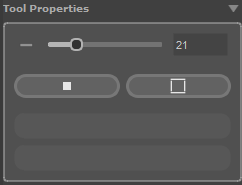
•Outline Width
Defines the width of the outline in pixels if Outline Mode is toggled on
•Fill / Outline
Toggle if you want to have a filled shape and/or one with an outline.
•Color
Fill and Outline color are controlled via the BG/FG Color swatches
To change a color ..
omanually edit them via the Color Selector Popup (click on color)
oDrag and drop a color swatch from the "Color Swatches" group onto the color field
oSingle click on a color swatch to assign the fill color
oAlt+Single click on a color swatch to assign the outline color
|
Editing and Transforming Ellipse Items |
•Editing previously created Ellipses
Ellipse Elements are tied to specific Layers marked with a "Square". Selecting a Shape Layer will auto select its contents and allow you to edit the item again.
Each Shape Layer can hold only one Shape Item (Polygon or ellispse)
Example of a Shape Layer
•Creating new shapes while on a shape layer
When on a Paint or Text Layer, dragging out a Shape will auto create a new Shape Layer for you. If you are already on an active Shape Layer, dobule click in the Nodegraph to create a new Shape Layer
•Transforming a Shape Element
A Shape Element can be scaled, rotated and moved in multiple ways:
Select the active shape layer and drag outside the shape to move it around
Hold CTRL to enter transform mode
Hold CTRL+SHIFT while rotating to rotate in 45 degree increments
If you prefer to use numerical values, switch to the "Transform Tool", activate the Layer Transform Option and use the text fields to enter values
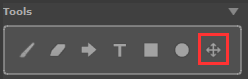
Tool Hotkey: Q
The Transform Tool allows you to
•Move, rotate and scale contents of a layer
•Move, rotate and scale an entire image note (with all its layers)
|
|
Text and Vector Layers can be easily transformed without having to select the tool by pressing and holding CTRL.. |
|
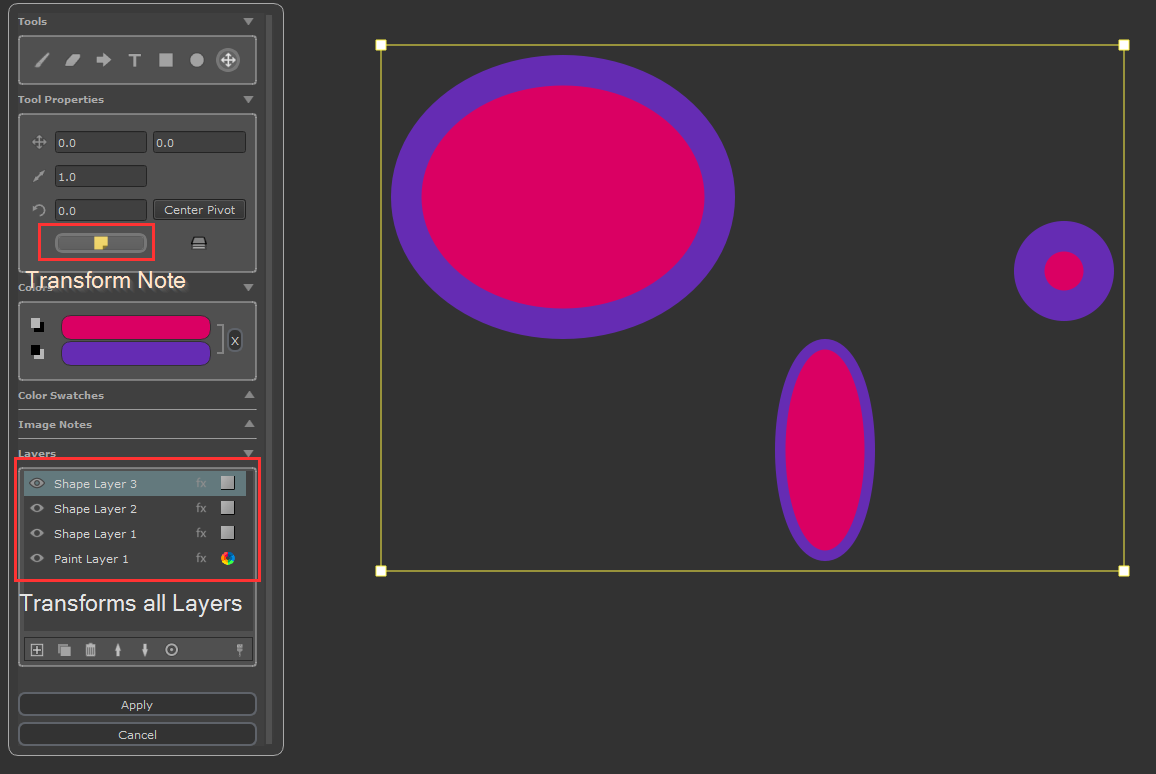
Transforming a Image Note with all its Layers |
To transform an entire note with all its Layers at one, select the "Transform Note" Mode. The Transform mode is indicated by the yellow bounding box around the contents of the image note
•Drag inside the bounding box to move the note and its contents
•Drag the handles to scale uniformly
•Drag outside the bounding box to Rotate. Hold Shift to rotate in 45 degree increments
•Alternatively use the Input Fields to input numerical transforms
|
Transforming a Layers Content |
To transform the contents of a layer (paint, text or shape layer), select the "Layer Transform Mode". The Transform mode is indicated by the blue bounding box around the contents of the layer.
•Drag inside the bounding box of a layer to move its contensts
•Drag the handles to scale uniformly or non-uniformly
•Drag outside the bounding box to Rotate. Hold Shift to rotate in 45 degree increments
•Alternativel use the Input Fields to input numerical transforms

While often times you will want to draw on your current view in the nodegraph, you may want to also add annotations to other - currently not visible parts of the graph.
It is possible to pan around the Nodegraph while the Sticker Designer is active. Zooming in our out however is not supported.
To pan use any of the three options below:
•Press ALT + Left Click and Drag in the Nodegraph
•Press Moue Middle Button and Drag in the Nodegraph
•Untoggle all tools. For example if the Paint Brush is active, press Hotkey "B" to uncheck it. When no Tool is active the Graph will be in Pan mode.
•All UI elements have tooltips explaining basic functionality and listing shortcuts
•Sliders can be adjusted in multiple ways, apart from directly modifying it
oDrag the icon next to a slider. Hold the ALT Hotkey to slow down the adjustment speed
oRight mouse click on a slider and drag an increment button for slower or faster adjustments
oPlace your cursor into the Text field and use Arrow Up / Down to modify the value
oIf you enter a value into the Input field that is outside the slider range, the slider will automatically re-range itself to account for the new value
When using the Paint Tool, Eraser or Arrow Tool, press & hold Hotkey Shift to create Straight Lines. Press and hold Hotkey CTRL+SHIFT to snap in 45 degree increments
|
Colors and Color Swatches |

For Paint Tools (Paint Brush, Arrow) you have Background and Foreground Colors available. You will draw with the Foreground Color.
Press the X Button or press Hotkey X to swap between foreground and background color

For Vector Tools (Text, Polygon, Ellispse) the two swatches act as the shape fill color and outline color instead.
Press the X Button or press Hotkey X to swap between Fill and outline color

•To modify the two colors click on the swatch to open the Color Picker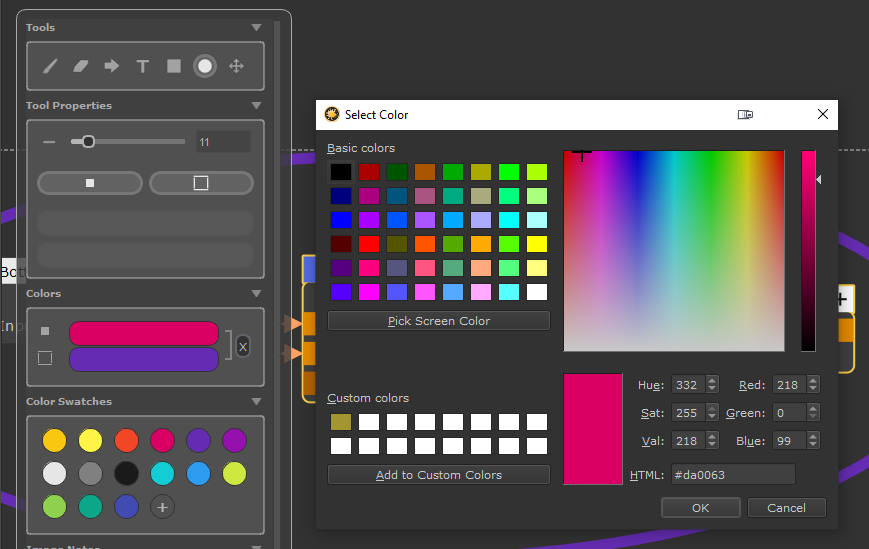
•You can also directly drag a color swatch from another color onto a swatch
•Clicking on a color swatch from the "Color Swatches" Group will assign the color to the Foreground/Fill Color.
ALT+Clicking on a swatch will assign it to the Background/Outline Color
•To add a new color switch, click on the "+" button. The currently active Foreground color will be added
•to delete a color swatch drag it. A "X" button will appear instead of the "+". Drag the swatch onto the X.
|
Image Notes |
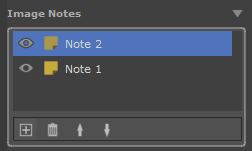
The Sticker Designer allows you to create and edit multiple separate Stickers at one. Once confirmed the Tool will create separate Image Notes in the Nodegraph for each item.
Each Image Note in the Sticker Designer has its own Layer Stack.
Example of two separate Stickers resulting in two separate Nodes when the Tool is confirmed
You can create as many separate Stickers as you like via the controls in the Image Notes Section of the Tool
To transform a Sticker and all its Layers, you can use the "Transform Tool"(Hotkey Q) in "Note Transform Mode". The Transform mode is indicated by the yellow bounding box around the contents of the image note
•Drag inside the bounding box to move the note and its contents
•Drag the handles to scale uniformly
•Drag outside the bounding box to Rotate. Hold Shift to rotate in 45 degree increments
•Alternatively use the Input Fields to input numerical transforms

•Create new Image Note
Adds a new Image Note with its own Layerstack
•Remove Selected Image Note
Deletes the currently selected Image Note
•Move Selected Image Note Up
Moves the currently selected Image Note up within the list of image notes
•Move Selected Image Note Down
Moves the currently selected Image Note down within the list of image notes
|
Layers |

Mos Tools (Paintbrush, Text Tool etc.) are tied to specific Layertypes. For example Text can only live on a "Text Layer".
The Sticker Designer will automatically create Layers for you if the currently active Layertype is not compatible with the tool you are using
In the below example we are on a "Text Layer". Switching to the Paint Tool and starting to draw will automatically create a "Paint Layer"
In total there are 3 Layer types available, and 2 additional variations.
•Text Layer
A text layer is indicated by its "T" icon. A Text Layer can hold exactly one Text Item.
Text Layers get automatically created by the Text Tool. You cannot manually create them.
If you are already on a Text Layer and want to create a second Text Item on a new Layer, double click in the Nodegraph.![]()
•Shape Layer
A shape layer is indicated by its square icon. A shape Layer holds vector items such as polygons or ellipses. A shape Layer can hold exactly one vector item.
Shape Layers get automatically created by the Polygon and Ellipse Tool. You cannot manually create them.
If you are already on a Shape Layer and want to create a second Vector Item on a new Layer, double click in the Nodegraph.![]()
•Paint Layer
A Paint layer is indicated by its color palette icon.
Paint Layers can be automatically created by tools or manually via the Layer Control Buttons at the bottom of the "Layers" Group
Paint Layers can hold pixel data created or modified by the Paint Brush Tool, Eraser Tool and Arrow Tool.![]()
•"Existing Image"
When you launch the Sticker Designer with one or multiple Image Notes selected, you will get asked if you want to lift the image notes into the Sticker designer for editing.
If you choose to lift them in, the image data from the Nodegraph Nodes will be placed on a new paint layer called "Existing Image". This Layer is just a paint layer and can be edited and amended with additional paint as required.
•"Pasted Image"
When you paste an image from your clipboard (CTRL+V) the clipboard image data will be placed on a new paint layer called "Pasted Image".
This Layer is just a paint layer and can be edited and amended with additional paint as required.
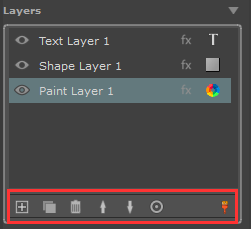
•Create new (Paint) Layer
Adds a new Paint Layer to the Layerstack
Hotkey: CTRL+SHIFT+N
•Duplicate selected Layer
Duplicate the selected Layer and its content
Hotkey: CTRL+D
•Remove selected Layer
Removes the selected Layer and its contents
Hotkey: SHIFT + CTRL + D
•Move selected Layer Up
Moves the selected Layer up in the Layer List
Hotkey: CTRL + Arrow Up
•Move selected Layer Down
Moves the selected Layer down in the Layer List
Hotkey: CTRL + Arrow Down
•Frame Layer Contents
Shifts the Nodegraph Position to frame the contents of the selected Layer.
This can be useful if you authored Image Note data that is outside of the current Nodegraph Framing
Hotkey: CTRL + F
•Bake Paint Buffer
The Paint Buffer Button & Icon indicate if there's unbaked paint in the buffer that can be baked by pressing the Button
Hotkey: B
Paint added via e.g. the Paint Tool or Arrow Tool first sits in the "Paint Buffer" before it gets baked down onto a Paint Layer
A colored icon indicates unbaked paint
A grey icon indicates that no paint needs baking
If you have unbaked paint you can press on the button to bake it manually. However usually paint is baked automatically when switching between tools or layers.
Any layer can be transformd (moved, scaled, rotated).
A dedicated Transform Tool can be used for this
The Transform Tool in the Tools Group

To Transform the contents of a layer, set the Transform Mode to "Layer"
Text and Shape Layers can also be easily transformed without having to go to the Transform Tool, by pressing and holding Hotkey CTRL
•Drag inside the bounding box to move the note and its contents
•Drag the handles to scale uniformly or non-uniformly
•Drag outside the bounding box to Rotate. Hold Shift to rotate in 45 degree increments
![]()
|
Layer FX |
Each Layer can have Effects such as Drop Shadows applied via its own FX Stack. To open the FX Stack click on the "FX" icon in the Layerstack![]()
A dedicated palette will open. You can move the palette around by clicking and dragging in one of its empty areas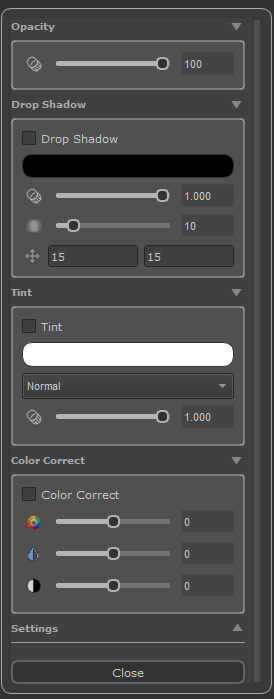
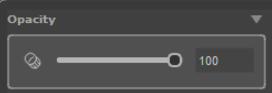
•Opacity
Adjusts the Opacity of the selected Layer
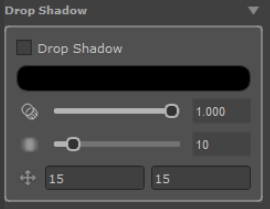
Dropshadows can be used to add a shadow to the contents of a layer

•Drop Shadow
Activate or deactivate the drop shadow effect
•Drop Shadow Color
Adjust the color of the Shadow
•Drop Shadow Opacity
Adjust theTransparency of the Shadow
•Drop Shadow Blur
Adjust the Blur Radius of the Shadow
•Drop Shadow Offset (X/Y)
Adjust the position of the shadow relative to the shape that is casting the shadow.
You can manually enter values, use the arrow up/down keys to adjust them or drag on the cross icon to change the position

The Tint options allow you to colorize a layer.
•Tint
Activate or deactivate the Tint Effect
•Tint Color
Adjust the color of the Tint
•Tint Blend Mode
Adjust the Mode used to apply Tint e.g Muliply, Screen etc.
•Tint Strength
Adjust the alpha of the Tint Effect resulting in stronger or weaker tinting
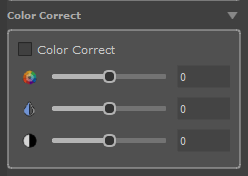
On Paint Layers the Color Correction option allow you to adjust Hue, Saturation and Value of the contents of the Layer
|
|
Color Correction options are only available on Paint Layers. |
•Color Correct
Activate or deactivate the Color Correction
•Hue
Adjust the Hue of the Layer contents
•Saturation
Adjust the Saturation of the Layer contents
•Value
Adjust the Value and Brightness of the Layer contents

•Copy/Paste
The copy/paste functionality allows you to copy/paste all settings of the FX Stack to another Layer. Choose the Layer to copy from and hit "Copy", then switch to another Layer and hit "Paste
•Reset
Resets all FX Stack Settings to their Defaults on the active Layer
|
Hotkeys |